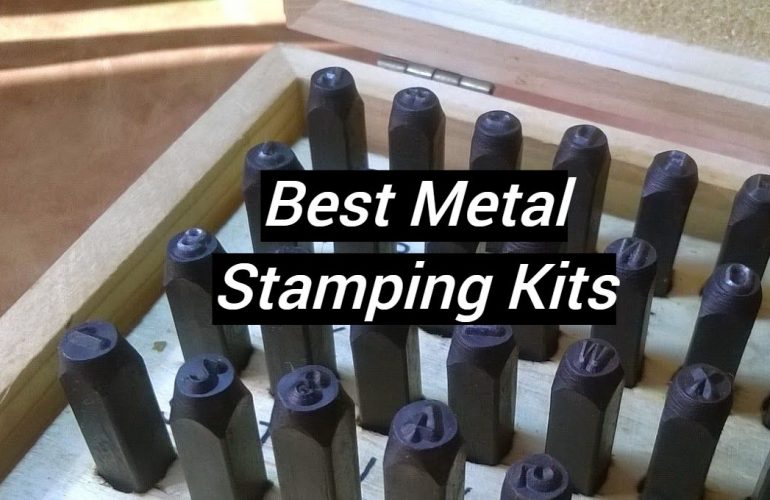
Choose the Best Metal Stamping Kit
Customer’s Choice: the Best Rated Metal Stamping Kits
65 users answered this survey. Please help us improve this review!
Looking for the best metal stamping kit? You’ve come to the right place! In this article, we will discuss everything you need to know about stamping kits. We’ll talk about the different types of kits available, what to look for when purchasing a kit, and some of our favorite kits on the market. By the end of this article, you’ll be ready to purchase your very own metal stamping kit!
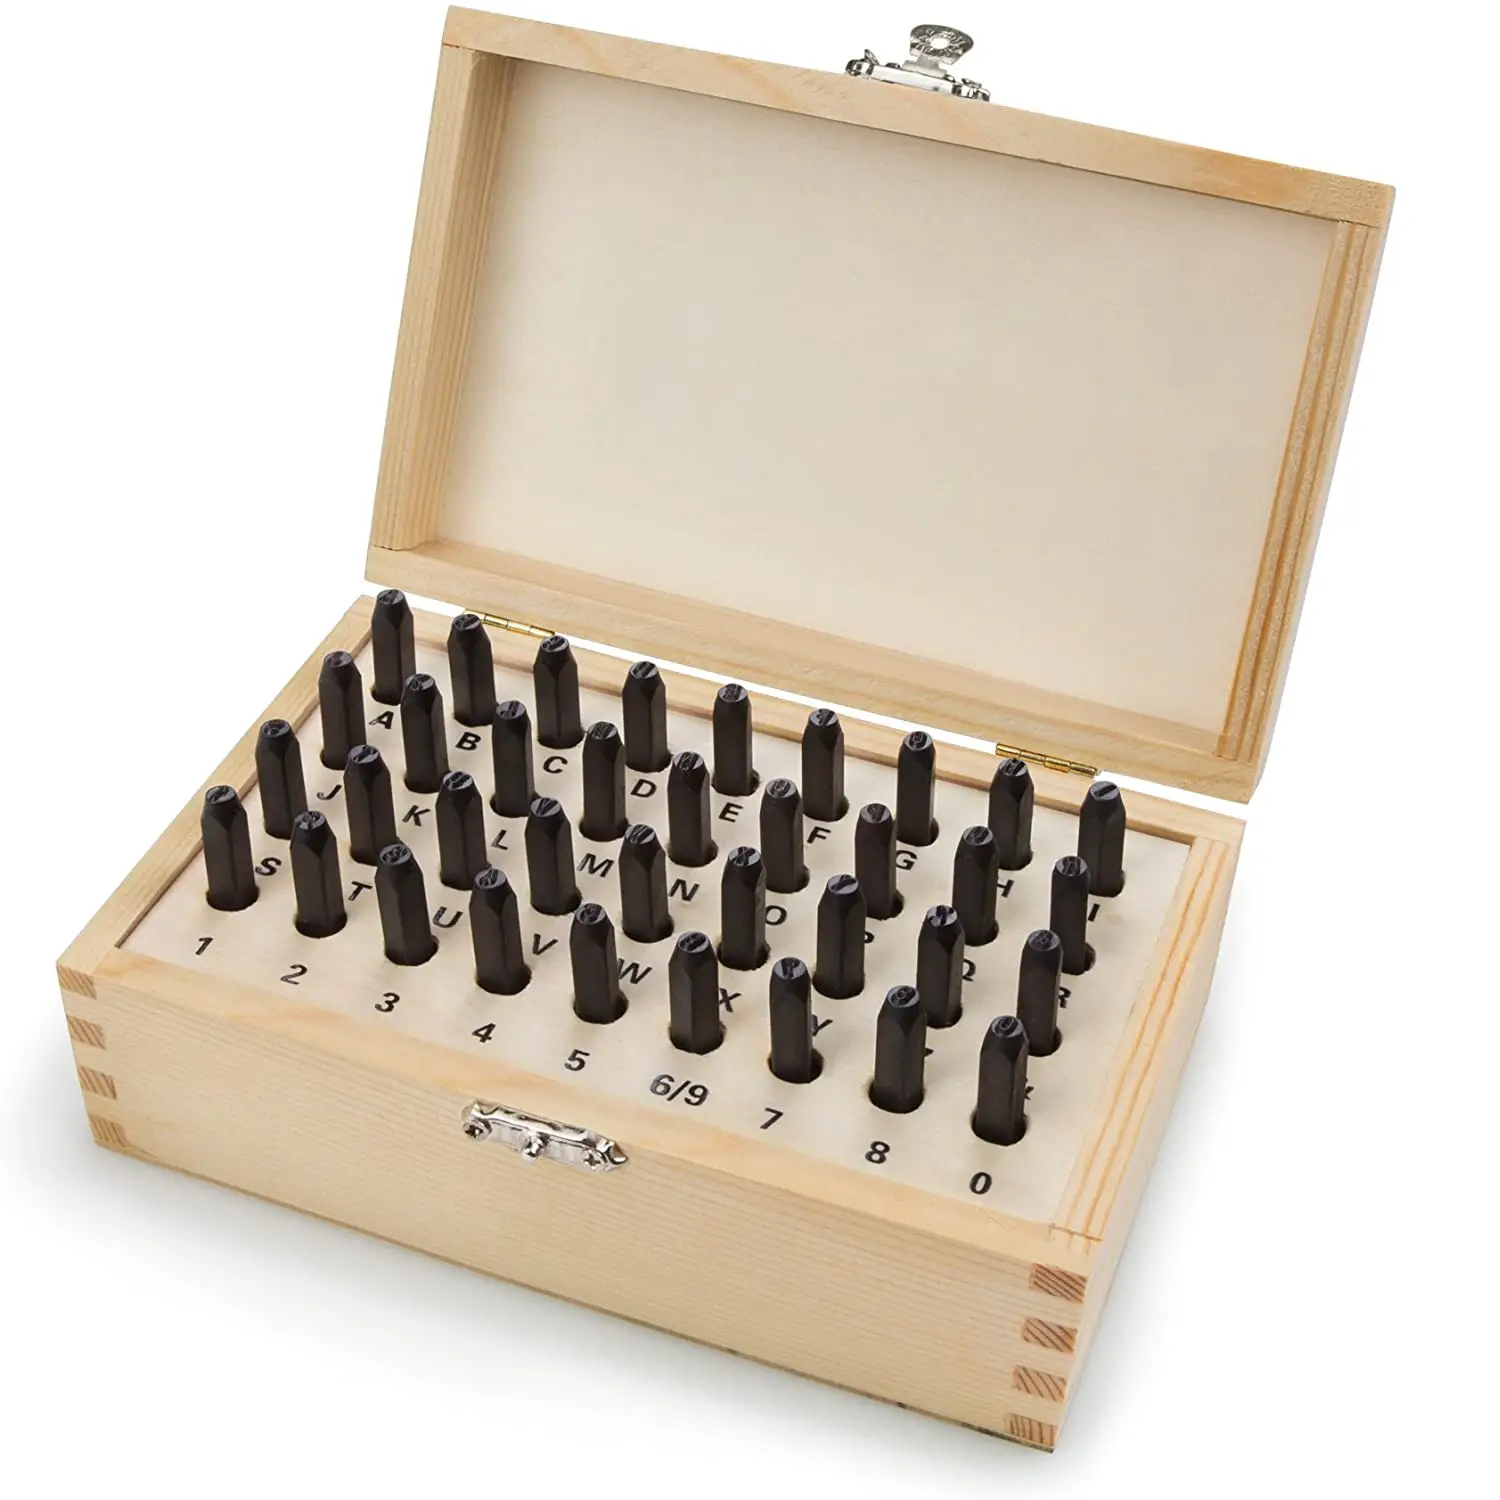
TEKTON Inch Letter and Number Stamp Set
 The TEKTON Inch Letter and Number Stamp Set makes it easy to personalize your belongings. Whether you’re looking to add a special touch to your jewelry or want to label your tools for organization, these stamps are perfect for the job. Made from alloy steel for durability, they will make a lasting impression on metal, wood, plastic, and leather.
Overall, the TEKTON Inch Letter and Number Stamp Set is a great product that offers durability and the ability to personalize your belongings. The set comes with a nice storage box, but be careful when using the stamps as they can break easily.
Custom Font Number and Letter Stamping Tool Case
 This tool case is perfect for any projects you have coming up! It includes 36 durable hardened steel 3mm stamps, so you can be sure your finished product will look amazing. The stamps are designed to be easy to press, so you won’t have to worry about smudging or making errors.
Overall, the Custom Font Number and Letter Stamping Tool Case is a great product that offers an easy way to add a personal touch to your belongings. The stamps are easy to use and produce clear impressions. However, the plastic case could be more durable and some of the letters were not as deeply stamped as others.
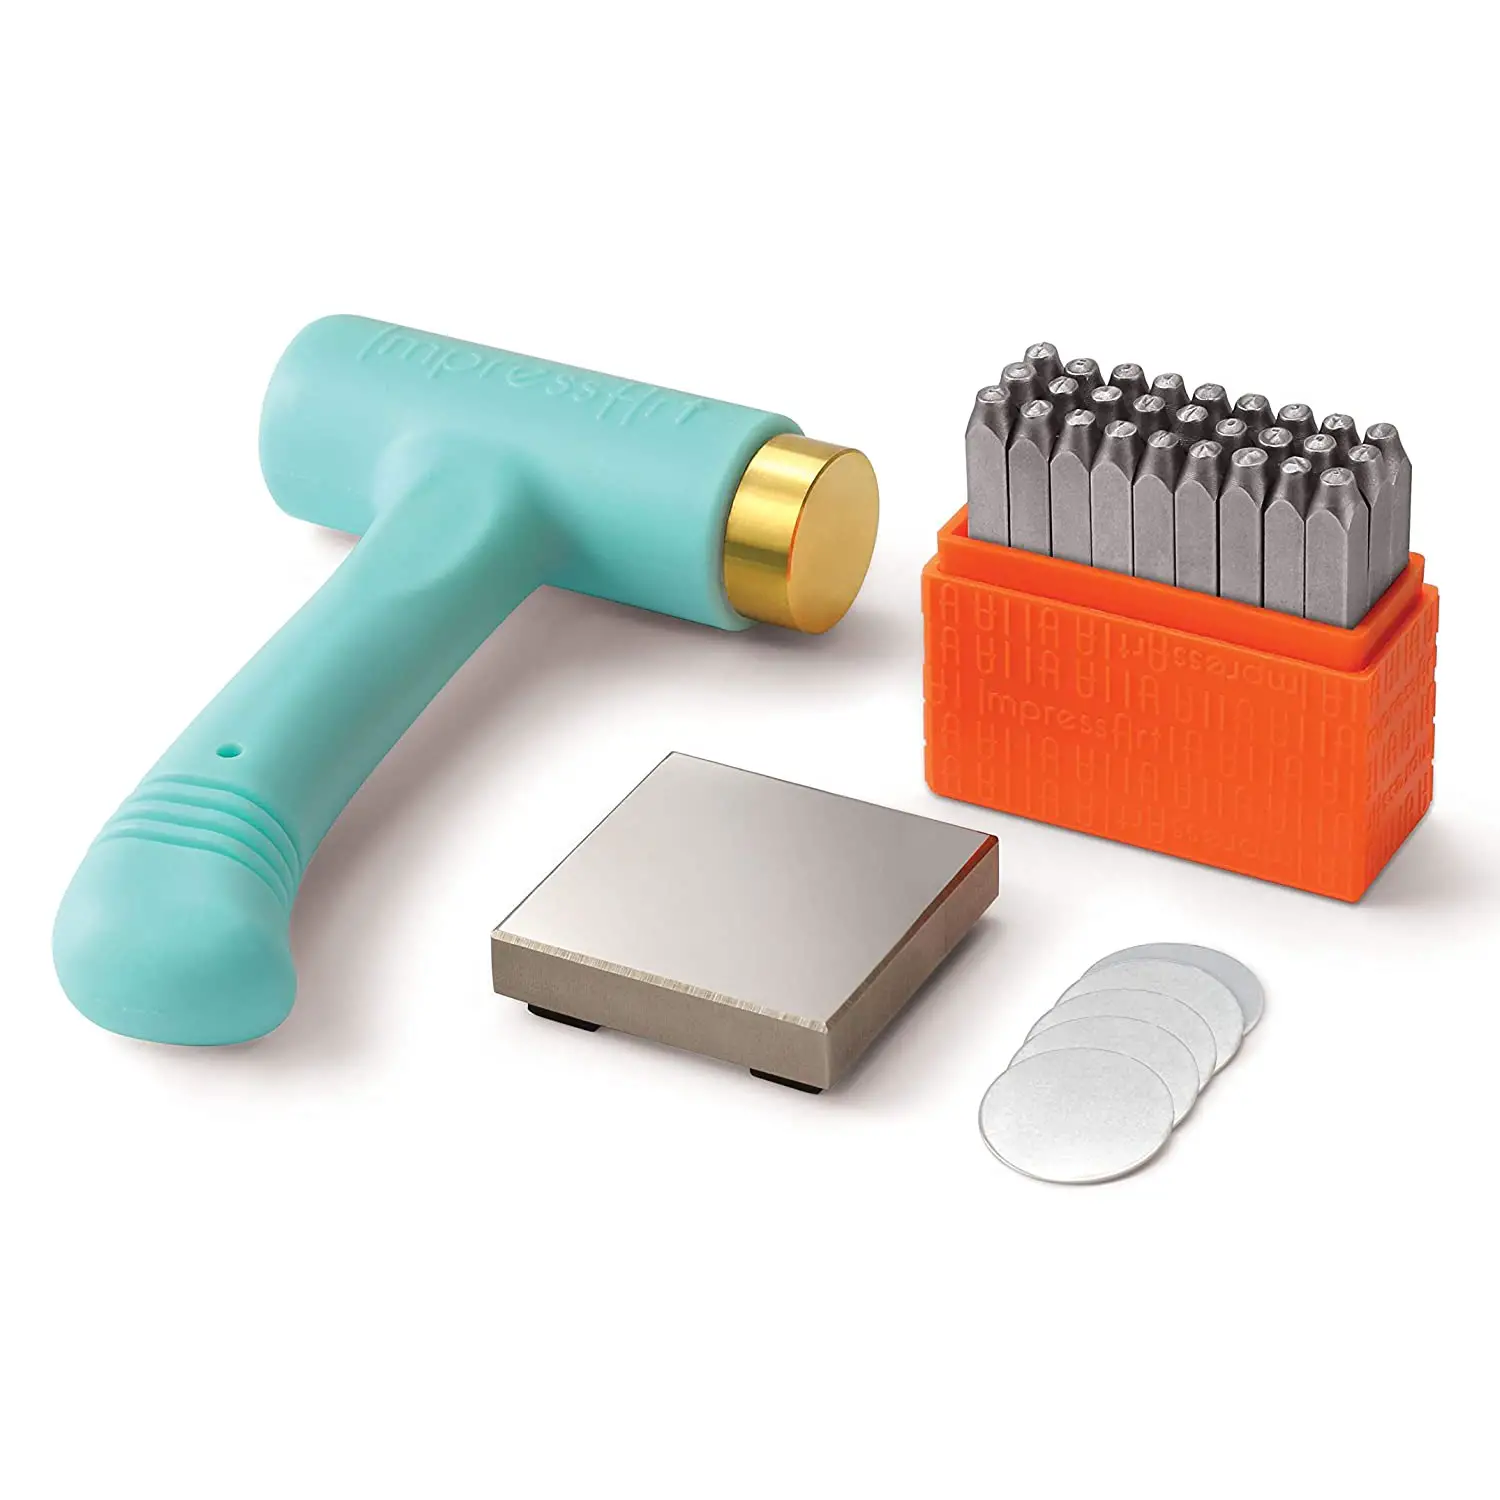
ImpressArt Metal Stamping Kit for Jewelry Making
 Create beautiful, handcrafted jewelry with the ImpressArt Metal Stamping Kit. This complete kit includes all the essential tools you need to get started, including a selection of custom-designed metal stamps, an ergo-angle metal stamping hammer, a steel block, and aluminum stamping blanks.
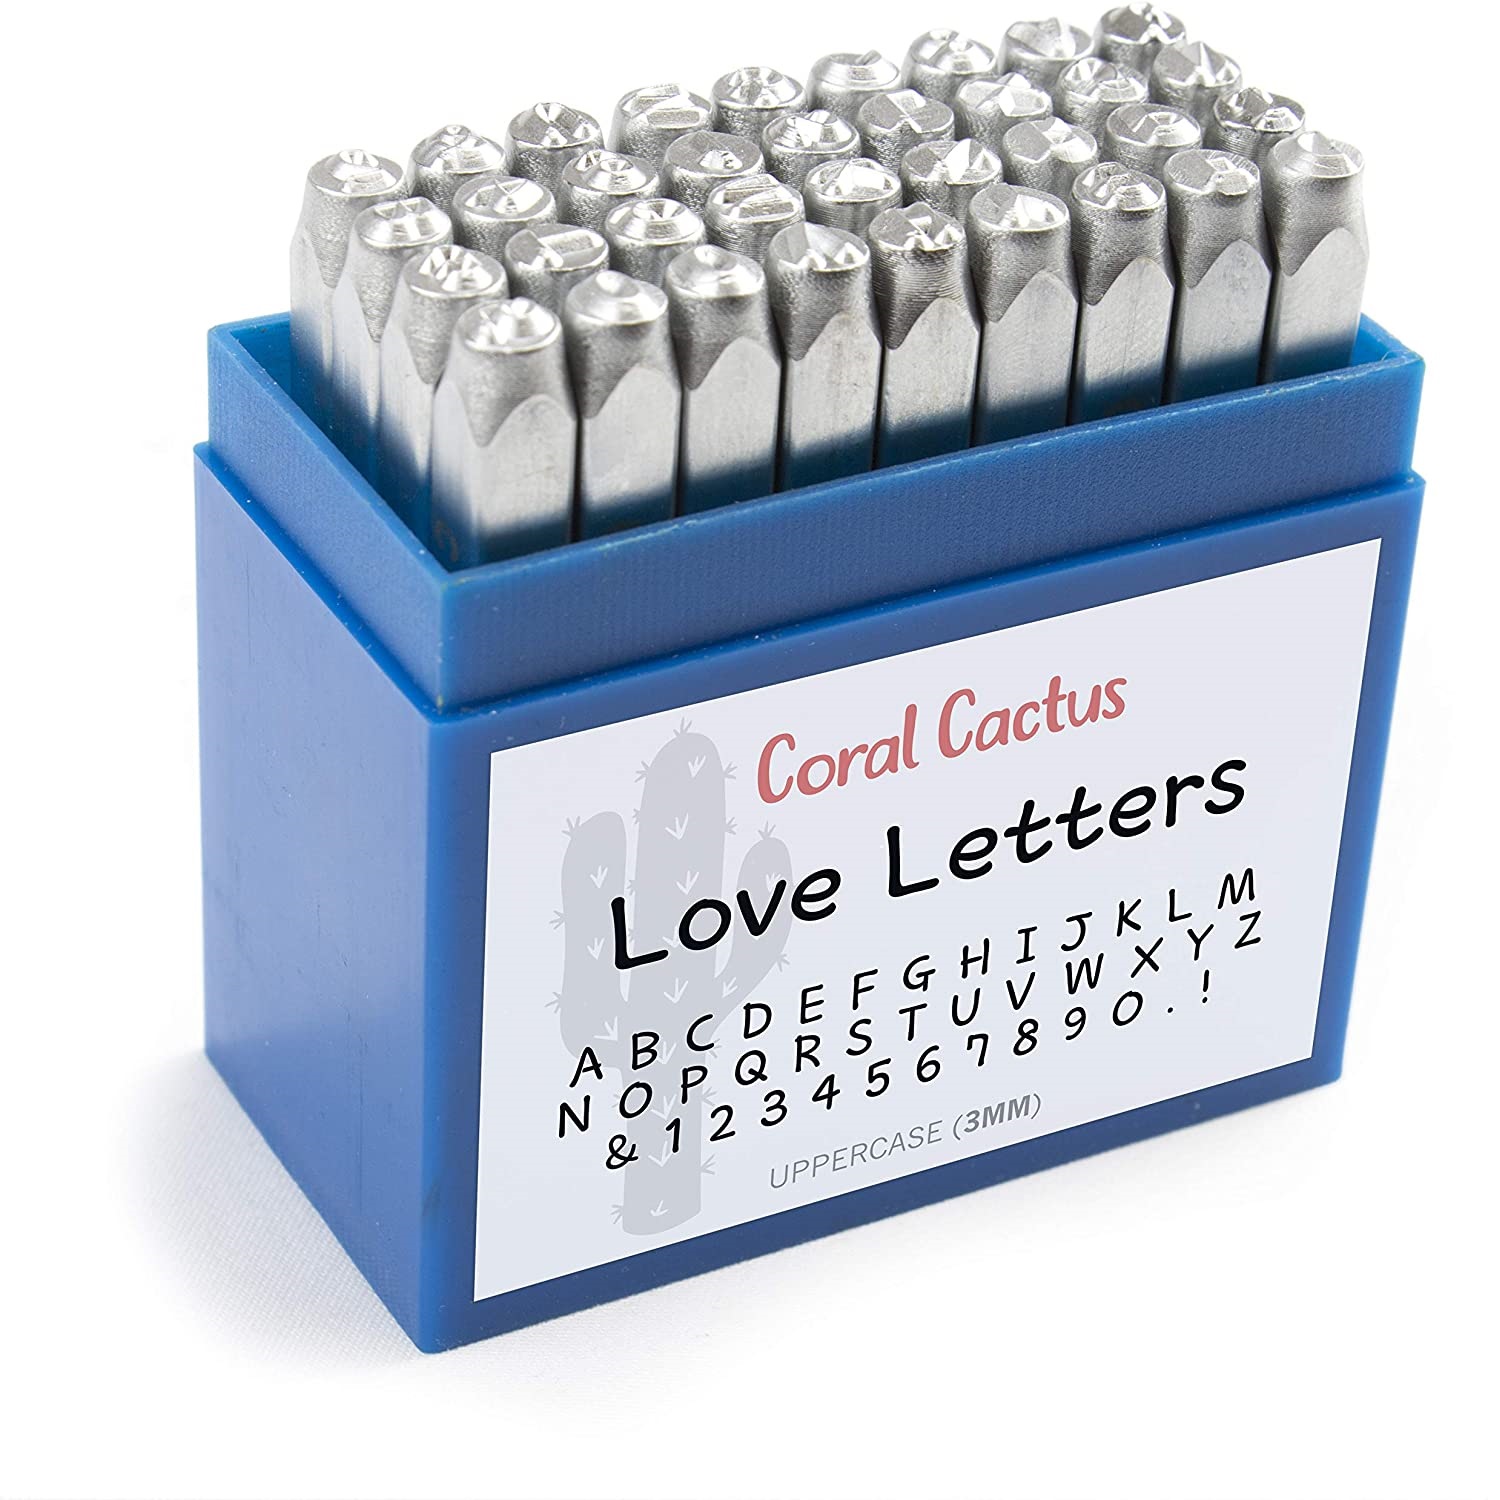
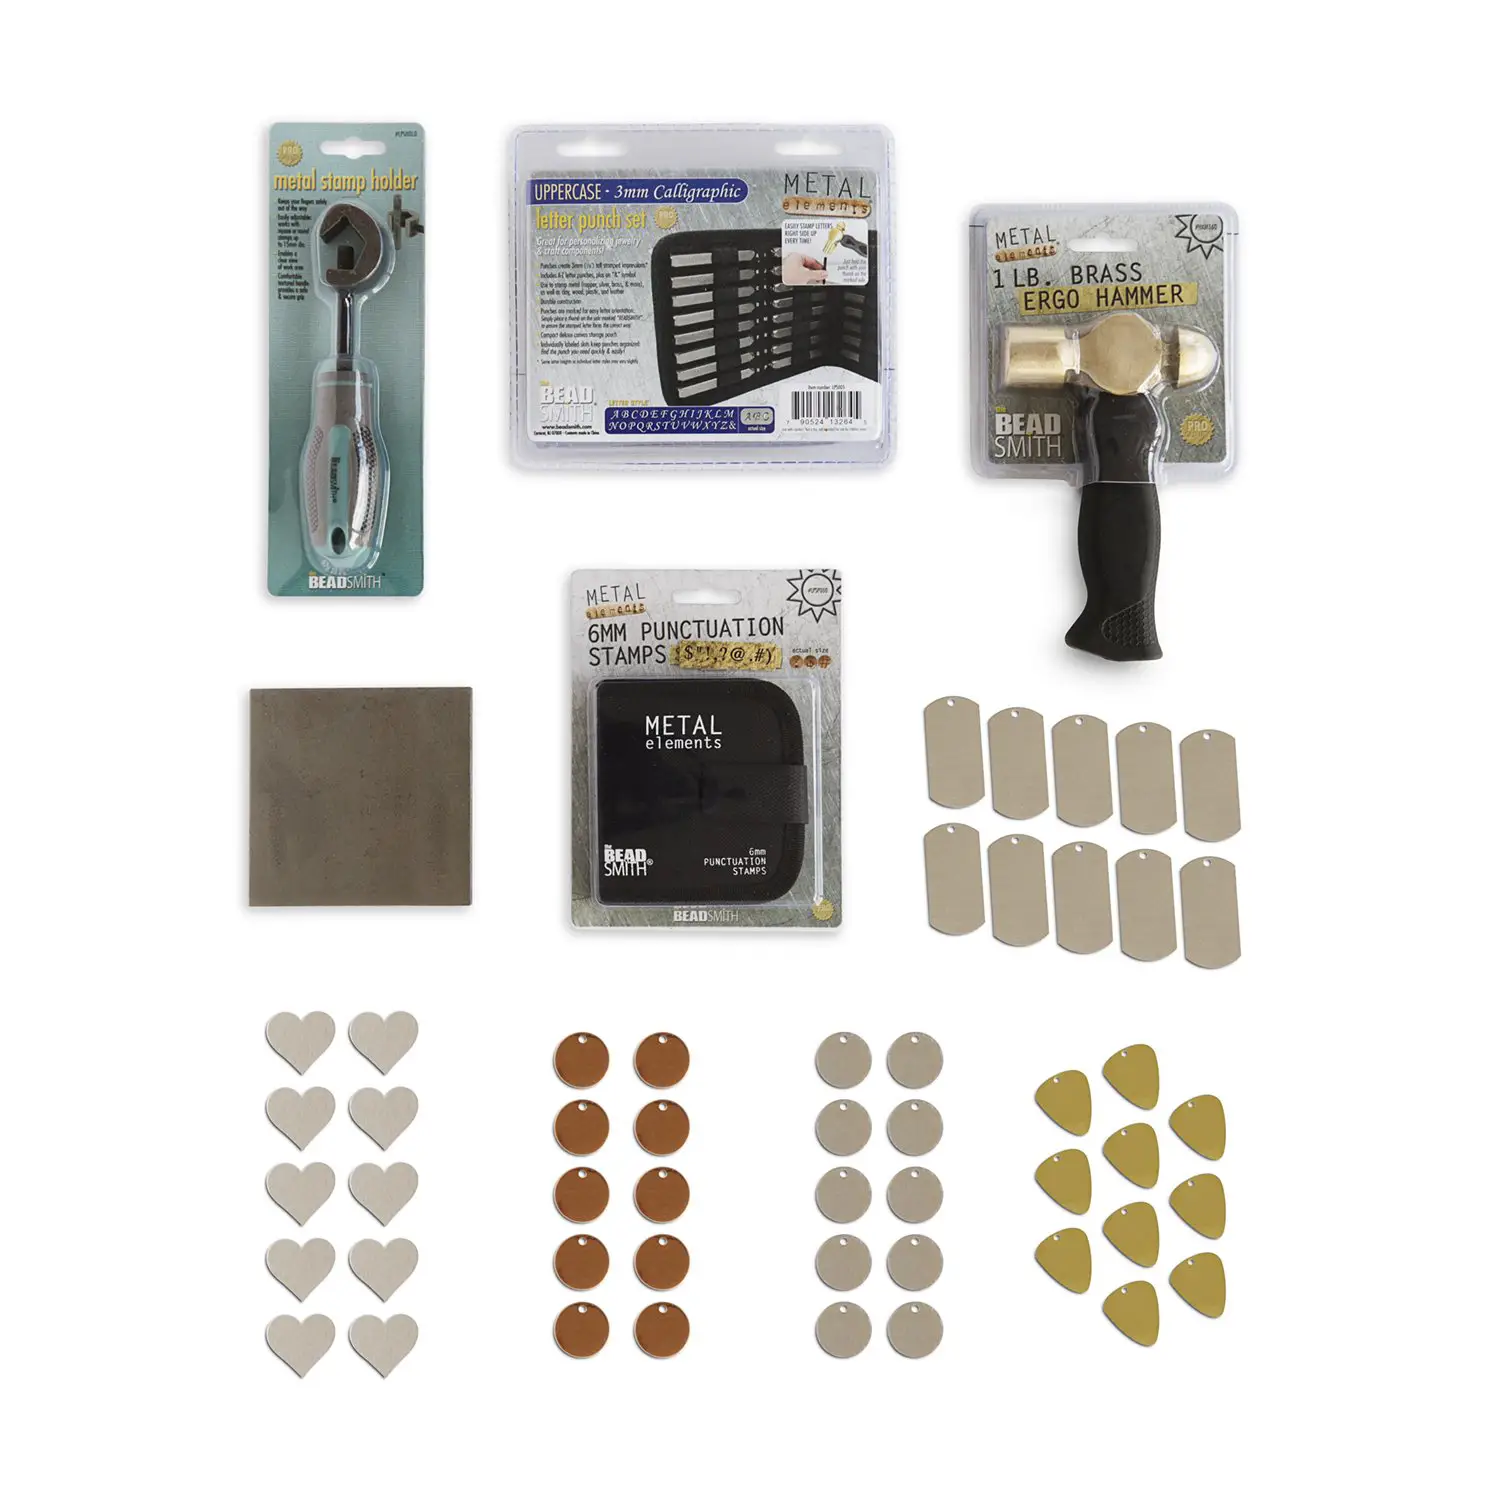
Metal Stamping Kit Calligraphic Uppercase RMP
 With this all-inclusive metal stamping kit, you’ll be able to make beautiful and intricate designs that are sure to impress. The calligraphy punch set is perfect for adding a touch of elegance to your designs, while the punctuation punch set is ideal for creating customized messages.
Don’t miss out on this must-have metal stamping kit – order yours today!
Overall, the RMP Metal Stamping Starter Kit is a great option for anyone who wants to get into metal stamping. It has everything you need to get started, and the stamps are a good size for most projects. The only downside is that it may be difficult to use for beginners. But if you’re willing to put in the time to learn, this kit will serve you well.
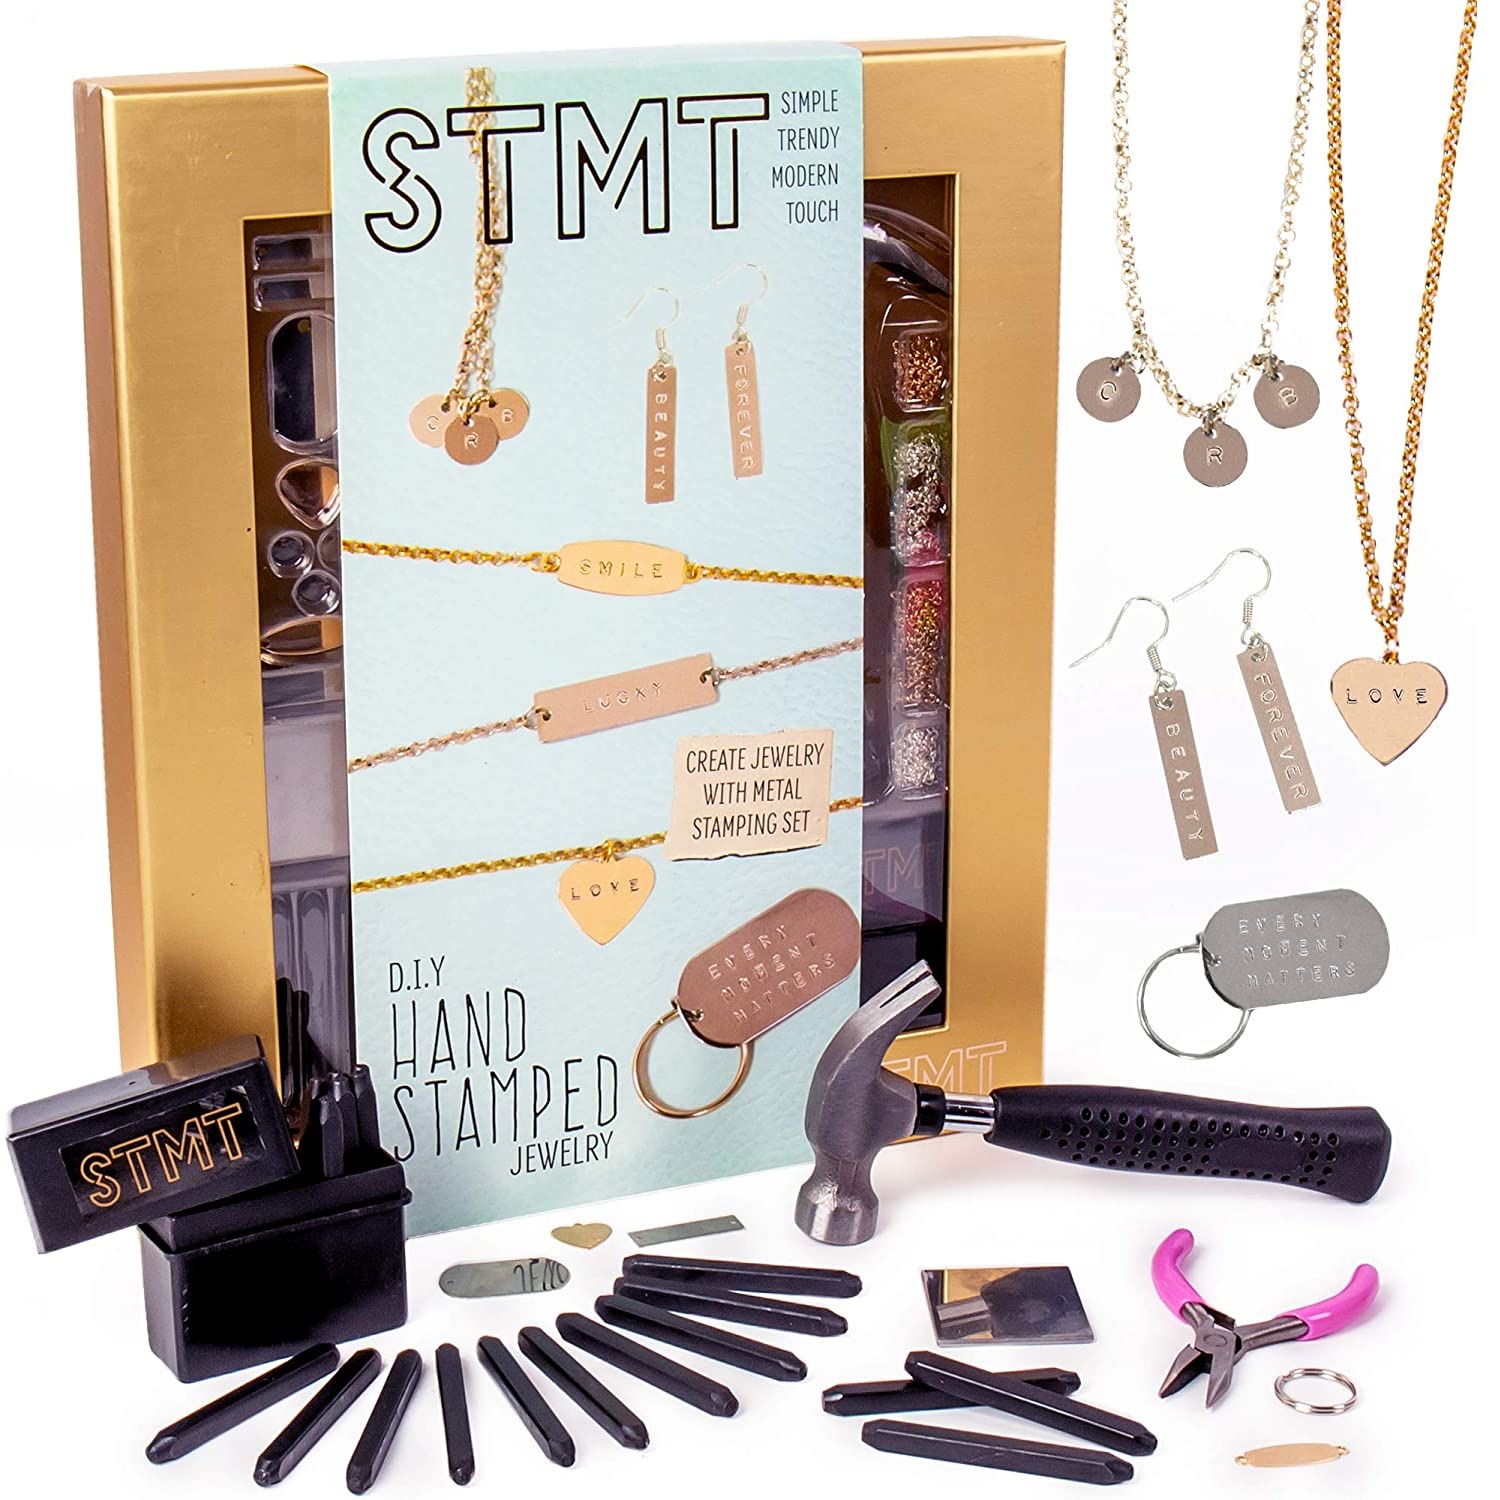
Hand Stamped Jewelry 14+ by STMT
 Introducing STMT’s newest line of jewelry-making kits – perfect for kids who want to show off their personality and style! With this kit, they can design and stamp their own charms with phrases, messages, or their name – to create unique earrings, necklaces, bracelets and more.
This is a great activity for self-expression, and kids will be surprised at how professional their jewelry looks when they’re finished. It also makes a great gift for birthdays, holidays, sleepovers or Easter baskets. Pair it with other STMT D.I.Y. kits like nail art, custom makeup or paper sets for even more fun!
Overall, the STMT jewelry-making kit is a great option for kids who want to design their own jewelry. The instruction booklet is easy to follow, and the kit includes both gold and silver charms. The disadvantage may be in the hardness of putting down the letters, but if you’re willing to put in the time to learn, this kit will serve you well.So, here are a couple of examples of products that you can familiarize yourself with and choose the most suitable one for you. Now, to understand the characteristics and proper use of metal stamping kits, we have prepared a buyer’s guide especially for you!
Buyer’s Guide
What is metal stamping?
Metal stamping is a process where shapes are cut out of metal sheets using molds. The molds are placed on the metal sheet and then hit with a hammer or press to create the desired shape.
Metal stamping can be used to create a variety of shapes, including letters, numbers, and symbols. It’s often used to personalize jewelry, as well as other items like keychains and dog tags. [1]
What is in Metal Stamping Kit
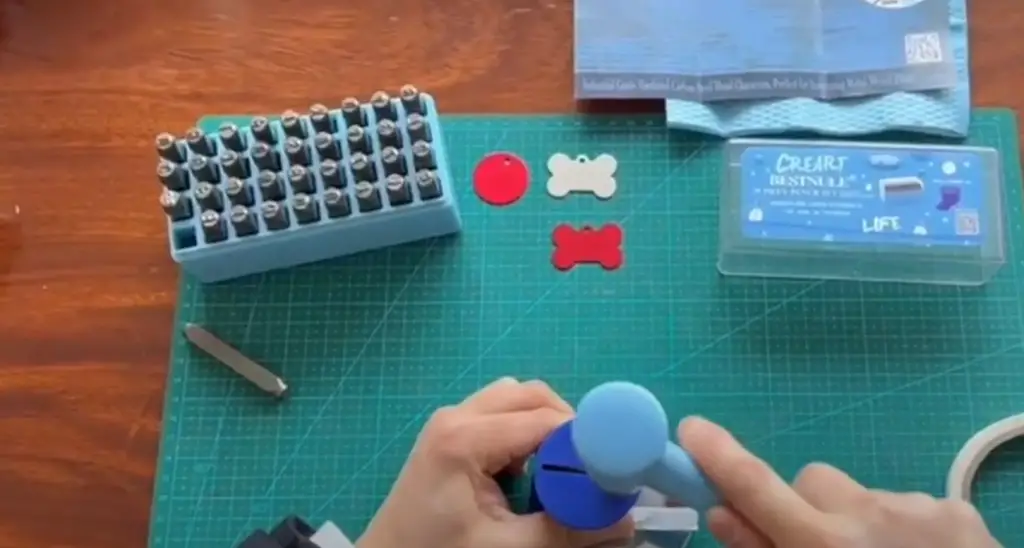
A typical metal stamping kit will include a variety of stamps, a hammer or press, and a work surface. Some kits also come with an anvil, which is a block of metal that can be used to help create shapes.
The stamps, on the other hand, are frequently composed of brass or steel and come in a range of sizes. The size you need will depend on the project you’re working on.
Stamping hammer
As we have mentioned before, in order to make an imprint, you will need a stamping hammer or a press. A stamping hammer is a handheld tool that is used to hit the stamps and create the shapes. A press is a larger machine that can be used for bigger projects. It works by placing the metal sheet on a die, which is then pressed down with the help of a lever.
Both hammers and presses can be bought separately or as part of a kit. If you’re just starting out, it’s probably best to get a kit that includes both so that you can try both methods and see which one you prefer.
Metal stamps (letters, numbers, icons, shapes)
The stamps themselves are usually made of brass or steel and come in a variety of sizes.
A lot of kits will come with a mix of letters, numbers, and symbols so that you can personalize your projects. If you’re looking for something specific, like all uppercase letters, then you may need to buy these separately.
Shapes can also be stamped into metal sheets. These are usually bought separately from the kit and come in a variety of designs.
Icons are another popular choice for metal stamping. These can be anything from animals to plants to geometric shapes. Again, these usually need to be bought separately from the kit.
Stamping block
A stamping block or anvil is a piece of metal that you can use to help create shapes. It’s placed underneath the metal sheet and helps to hold it in place while you’re stamping.
Some kits will come with a stamping block, but if yours doesn’t, they’re usually not too expensive to buy separately.
An anvil is a type of stamping block that has two flat surfaces. This can be helpful if you’re working on a project that has multiple sides, like a pendant or charm.
Again, anvils are usually sold separately from the kit but can be found for relatively cheap online or at hardware stores.
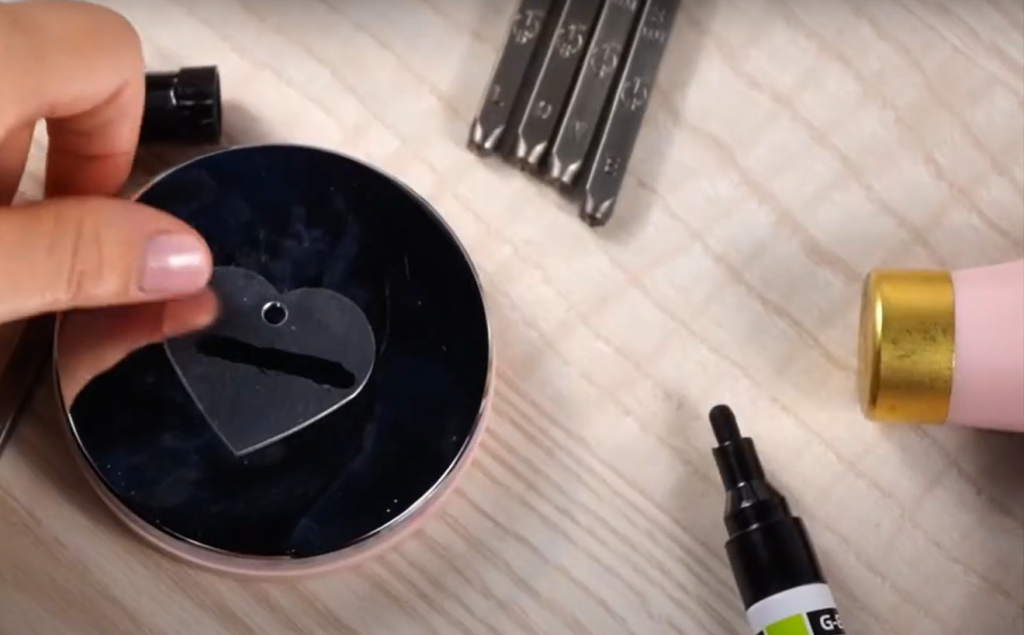
Metal tags/blanks
In order to stamp something, you need a metal sheet or tag to stamp it onto. These can be bought as part of a kit or separately.
Tags are usually made of brass, aluminum, or steel. They come in a variety of shapes and sizes and can be found at most craft stores.
Blanks are pieces of metal that have been cut into specific shapes. These are generally more expensive than tags but can be helpful if you’re working on a project with multiple parts that need to fit together perfectly.
Blanks can also be custom-ordered from some companies if you need a specific size or shape that you can’t find elsewhere.
Stamping tape
One of the most important aspects of a good stamping kit is the quality of the stamping tape. This is what will determine how clear and precise your stamped images will be. There are a few things to look for when choosing stamping tape:
- Look for a tape that is acid-free and lignin-free. This will ensure that your stamped images don’t fade over time.
- Make sure the tape is at least 18 inches wide. This will give you plenty of room to work with when stamping large images.
- Choose a tape that has a strong adhesive backing. This will prevent your stamped images from smudging or shifting during the stamping process.
Polishing cloth
A polishing cloth is a soft, lint-free cloth that can be used to buff and shine your stamped images. These are usually included in stamping kits and can be found at most craft stores.
Polishing cloths come in a variety of materials, including cotton, microfiber, and flannel. Choose whichever one you prefer or have on hand.
Why do you need all of these tools?
Each of these tools serves a specific purpose and will help you create a better stamped images. By having all of the necessary tools, you’ll be able to create professional-looking stamped jewelry, tags, and other projects.
Stamping hammer
A stamping hammer is a specialized tool that is used to transfer the image from the stamp onto the metal. The head of the hammer is usually made from steel or brass, and it has a rounded face.
The weight of the stamping hammer is important because it needs to be heavy enough to make a clear impression, but not so heavy that it will damage the metal. A good rule of thumb is to choose a hammer that weighs about twice as much as the piece of metal you are working with.
In addition to a regular stamping hammer, you may also want to consider investing in a ball-peen hammer. This type of hammer has a slightly different shaped head, which can be useful for creating different effects on the metal.
Metal stamps (letters, numbers, icons, shapes)
Metal stamps are the tools that you will use to create the actual design on the metal. The stamps are available in a wide variety of sizes, fonts, and styles. You can also find stamps that have numbers and icons, which can be useful for creating tags or other identifying marks.
When choosing metal stamps, it is important to consider the size of the projects you will be working on. For smaller projects, you will want to choose smaller stamps. For larger projects, you may want to invest in a set of larger stamps.
It is also important to think about the font style of the stamps. Some people prefer simple fonts while others like ornate fonts. There is no right or wrong answer here, so it is simply a matter of personal preference.
Once you have a set of stamps, you will need to decide how to store them. One option is to keep them in a stamping kit, which will usually have a case or box that holds all of the stamps. Another option is to purchase a storage system specifically for metal stamps. This can be particularly helpful if you have a large number of stamps.
Stamping block
We highly recommend getting a stamping block as part of your kit. A stamping block is a piece of metal or wood that you use to hold your stamps in place while you’re working. They come in a variety of sizes, but we recommend getting one that’s at least four inches square. That way, you’ll have plenty of room to work and you won’t have to worry about your stamps slipping out of place.
We prefer wooden blocks because they’re easier on the stamps and they’re less likely to slip. However, if you’re going to be doing a lot of stamping, you might want to get a metal block because it will be more durable.Metal tags/blanks
These are the actual pieces of metal that you’ll be stamping your designs onto. You can find them in a variety of materials, but we recommend getting tags or blanks made from brass or stainless steel. Brass is a softer metal, so it’s easier to stamp and it has a nice vintage look. Stainless steel is more durable and it won’t corrode over time. Whichever material you choose, make sure to get tags or blanks that are at least 16 gauge (thicker is better). That way, they’ll be sturdy enough to hold up to repeated stamping.
You’ll also need to decide what size and shape you want your tags or blanks to be. The most popular sizes are one inch square and two inches square. However, you can also find tags and blanks in other shapes, such as circles and ovals. It’s really up to you what you want to use. Just make sure that the size and shape of your tags or blanks will work with the stamps you have.
Stamping tape
Stamping tape is a great way to add texture and interest to your stamped images. You can purchase pre-made stamps or make your own with rubber stamps and an acrylic block. To use stamping tape, simply adhere the desired length of tape to your paper or project surface and stamp as usual. When you’re finished, peel off the tape to reveal your design.
Stamping tapes come in a variety of widths, colors, and patterns, so you’re sure to find one that suits your needs. Be sure to test the stamping tape on a scrap piece of paper before using it on your final project to ensure that you’re happy with the results.
Polishing cloth
A polishing cloth is a must-have for anyone who wants to keep their metal stamps clean and in good condition. Simply rub the cloth over your stamps after each use to remove any ink or debris. For best results, polish your stamps with a lint-free cloth like microfiber or cotton.
Be sure to store your polishing cloth in a safe place when you’re not using it so that it doesn’t become stained or damaged. A zip-top baggie or small container will do the trick.
With these essential supplies, you’ll be well on your way to creating beautiful stamped images. Be sure to experiment with different techniques and materials to find what works best for you.
Preparation tips
Before you begin stamping, there are a few things you can do to set yourself up for success. First, take a moment to gather all of the supplies you’ll need so that you don’t have to stop in the middle of your project to search for something.
Next, decide what size and shape stamps you want to use. This will help you determine how much space you need to leave between each stamped image.
Finally, make sure your work surface is clean and free of any debris. A lint-free cloth can be used to wipe away any dust or fingerprints before you start stamping.
How to Metal Stamp
Now that you have all of your supplies, it’s time to start stamping! Begin by positioning your stamps on your work surface. If you’re using a stamping block, make sure the stamps are positioned in the same direction so that they will stamp evenly.
Next, use an ink pad or other ink source to apply ink to your stamps. Be sure to cover the entire surface of each stamp for best results.
Finally, place your paper or project surface over the top of the stamps and press down firmly. Apply even pressure across the entire surface to ensure that all of the stamps transfer their image.
Lift up your paper or project surface to reveal your stamped design. If necessary, use a cotton swab or other soft-bristled brush to remove any excess ink from the stamps.
Finishing touches & Extra tools
Once you’ve stamped your images, you can add a few finishing touches to give them some extra pizzazz. For instance, try coloring in the stamped images with markers or colored pencils. Or, use a white gel pen to add highlights or details.
Experiment with different colors and techniques to see what you can come up with!There are a few extra tools that can come in handy when stamping. A stamping platform or jig can be used to hold your stamps in place while you apply ink. This is especially helpful if you’re stamping on a curved surface or working with smaller stamps.
A brayer is another useful tool that can be used to apply ink evenly to your stamps. Simply roll the brayer over your ink pad, then roll it over your stamps. This technique is especially helpful if you’re using a smaller ink pad.
Letters with impact
One of the most popular ways to use metal stamps is to create custom letters and words. This can be a great way to personalize gifts, make signage for your home or office, or simply add a special touch to your papercraft projects.
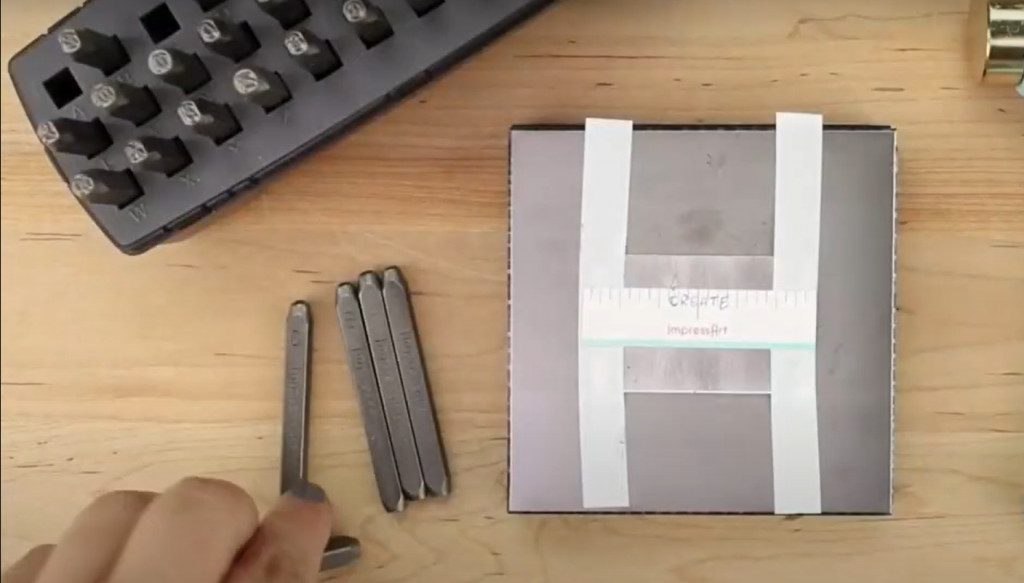
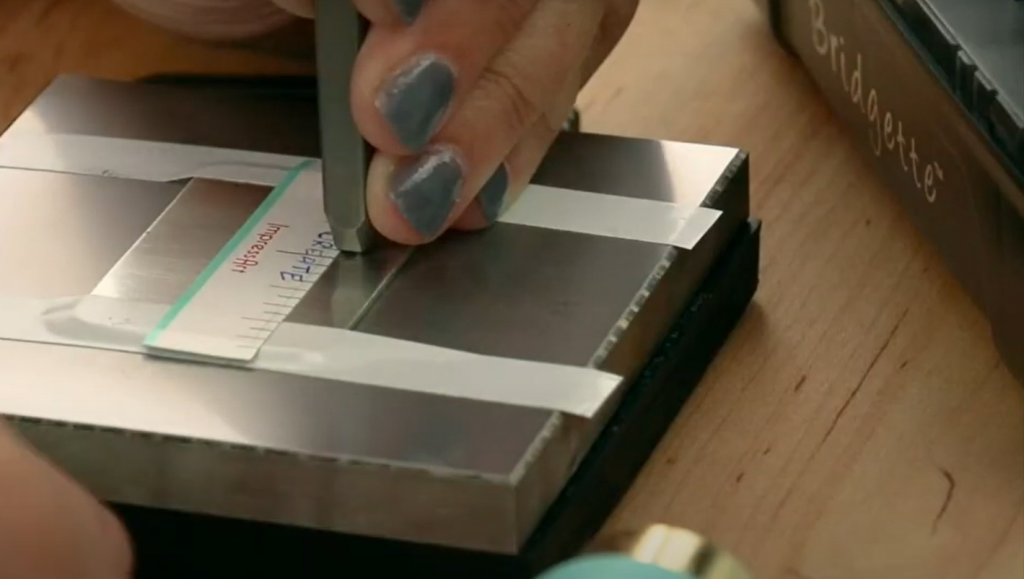
To create stamped letters, start by finding a font that you like. Print out the letters you need on plain paper. Then, use a pencil to trace over the top of each letter. Next, position the traced letters on your work surface and transfer the outline onto the surface with a pen or other sharp object.
Once you have your outlines transferred, it’s time to start stamping! After you’ve prepared your stamp, use an ink pad or another type of ink supply to apply ink uniformly throughout it.
Making holes
Another popular way to use metal stamps is to create holes for stringing or other purposes. This can be a great way to add a decorative touch to gifts, cards, and other projects.
To create stamped holes, start by finding a stamp that has the desired shape and size. Position the stamp on your work surface and use an ink pad or other ink source to apply ink evenly to the surface.
Next, place your paper or project surface over the top of the stamp and press down firmly. Apply even pressure across the entire surface of the stamp to ensure that it transfers its image onto the paper.
Finally, use a sharp object (such as a pencil or awl) to poke through the center of each stamped image. This will create the holes you need for stringing or other purposes.
Surface effects
There are a variety of surface effects that can be achieved with metal stamping. A popular surface effect is called “embossing.” Embossing involves using a die to create a raised design on the surface of the metal. This raised design can be either positive (raised above the surface of the metal) or negative (recessed below the surface of the metal). Other popular surface effects include texturing, polishing, and annealing.
By adding unique and interesting surface effects, you can make your products stand out from the competition. In addition, metal stamping offers a wide variety of other benefits, such as increased durability, improved aesthetics, and the ability to create complex designs.Textures
There are all sorts of ways to add texture to your stamped images. Some stamps come with a variety of textures built in, while others can be purchased separately. You can also create your own textures using household items like sandpaper or corrugated cardboard.
One way to add texture is by using different techniques when inking your stamp. For example, you can try using a circular motion or patting the ink pad directly onto the stamp. Experimenting with different inking techniques is a great way to add interest to your stamped images.
Another way to add texture is by embossing your stamped image. This can be done with a variety of tools, including an embossing gun, an embossing plate, and even a simple kitchen fork!
Of course, you don’t have to add texture to your stamped images if you don’t want to. Sometimes a simple, unembellished image can be just as beautiful as one that’s been adorned with all sorts of extras.
Shapes
Metal stamps come in all sorts of shapes and sizes. The most common shape is the rectangular block, but you can also find stamps that are oval, round, triangular, and even heart-shaped.
If you’re stamping on paper, then the shape of your stamp will likely be dictated by the size of the paper. For example, if you’re using a standard sheet of printer paper, then a rectangular stamp would be the best choice. However, if you’re working with a smaller piece of paper, like a gift tag or postcard, then a round or oval stamp would be more appropriate.
When it comes to metal stamps, there are really no rules. So whatever shape you choose is entirely up to you!
Dapping
Dapping is a metal stamping technique that allows you to create raised, three-dimensional images. To dap, simply place your stamp on the desired spot on your piece of metal and then use a hammer to strike it firmly.
You can dap stamps that have been made specifically for this purpose, or you can repurpose other types of stamps by attaching them to a block of wood. Either way, dapping is a great way to add interest and dimension to your stamped images.
Where is Metal Stamping Used
Metal stamping is most commonly used in jewelry making, but it can also be used to create other types of decorative items, like keychains, bookmarks, and even paperweights. Basically, if you can think of it, chances are you can stamp it!
Metal Stamping Tips
Now that you know a little bit more about metal stamping, here are some tips to help you get started:
- Start with a simple design. Metal stamping can be quite intricate, but it’s best to start with a simpler design until you get the hang of it.
- Use stamps that are specifically designed for metal stamping. These stamps will have a sharper edge, which will make them easier to use.
- Be sure to use the correct tools. In addition to a hammer, you’ll also need an anvil or block of wood to stamp on.
- Protect your work surface. Cover your work surface with a towel or piece of cloth to prevent scratches.
- Take your time. Metal stamping is not a fast process, so be sure to give yourself plenty of time to complete your project.
- Experiment with different techniques. As you become more comfortable with metal stamping, experiment with different inking and embossing techniques to create unique images.[2]
Care & Maintenance
With proper care and maintenance, your metal stamps will last for years to come. Here are some tips to keep them in tip-top shape:
- Store your stamps in a cool, dry place.
- Avoid getting them wet.
- Clean them with a soft cloth after each use.
Sharpen the edges of your stamps periodically using a sharpening stone. This will help to keep them in good condition and prevent them from becoming dull over time.
FAQ
Can you use metal stamps on paper?
Yes, you can use metal stamps on paper. However, keep in mind that the stamps will likely leave an impression on the paper, so you’ll want to use a heavier weight paper if you plan on using them for writing or printing.
In addition, metal stamps can be used to create raised images on paper. To do this, simply place your stamp on the desired spot on your piece of paper and then use a hammer to strike it firmly. [3]
What is a stamping press used for?
A stamping press is a machine that helps to create metal products by applying pressure to a die. The die is a negative image of the product you wish to create, and it helps to give the metal its shape. A stamping press can be used for many different applications, including creating car parts, coins, and even medical devices.
There are two types of stamping presses: mechanical and hydraulic. Mechanical presses use cams and cranks to apply pressure, while hydraulic presses use fluid power to do the same thing. Each type has its own advantages and disadvantages, so it’s important to choose the right one for your needs.
Hydraulic presses are more expensive than mechanical presses, but they’re also faster and can apply more pressure. This makes them ideal for large-scale projects. Mechanical presses are slower and can’t apply as much pressure, but they’re less expensive and easier to maintain.
No matter which type of press you choose, you’ll need a metal stamping kit to get started. These kits come with all the necessary tools and materials, so you can start stamping right away.[4]
What is the easiest metal to stamp?
There are a few different metals that are commonly used for stamping, but some are easier to work with than others. For example, aluminum is a soft metal that’s easy to stamp but doesn’t hold up well to wear and tear. Steel is stronger and more durable, but it’s also harder to stamp. Copper is somewhere in between, offering a good balance of strength and malleability.
If you’re just starting out, it’s probably best to choose an easier metal like aluminum. This will help you get the hang of stamping without as much frustration. Once you’ve mastered the basics, you can move on to tougher metals like steel.
What are the four types of metal stamping?
There are four main types of metal stamping: embossing, engraving, die-cutting, and punching.
Embossing is a process that raises the image on the metal surface. This can be done with a variety of tools, including stamps, rollers, and presses.
Engraving is the process of carving an image into the metal surface. This can be done by hand or with a machine, and it’s often used to create detailed designs.
Die-cutting is a process that uses a sharp die to cut out shapes from a sheet of metal. This is often used to create intricate patterns or to mass-produce parts.
Punching is a process that uses a punch to make a hole in the metal. This is often used to create drainage holes or to attach parts together.
All four of these processes can be used to create metal products, but each has its own advantages and disadvantages. It’s important to choose the right one for your needs.
If you’re just starting out, embossing is probably the best option. It’s relatively easy to do and doesn’t require any special equipment. Once you’ve mastered embossing, you can move on to more difficult techniques like engraving or die-cutting.[5]
Can you use regular washers for metal stamping?
Yes, you can use regular washers for metal stamping. In fact, many people prefer to use washers because they’re easier to work with than other types of metals. However, there are a few things you should keep in mind if you decide to use washers.
First, washers are generally made from softer metals like aluminum or brass. This means they’re easy to stamped but won’t hold up as well to wear and tear. If you need a durable product, it’s probably best to choose a different metal.
Second, washers come in all sorts of sizes and thicknesses. You’ll need to choose the right size for your project, or else the final product won’t look quite right.
Finally, washers have a tendency to bend or deform when stamped. This isn’t necessarily a bad thing, but it’s something you should be aware of. If you need a perfect stamp, you might want to choose a different metal.
Overall, washers are a good option for metal stamping. They’re easy to work with and come in a variety of sizes. Just keep in mind that they’re not as durable as some other metals.
Can you use a regular hammer for metal stamping?
No, you cannot use a regular hammer for metal stamping. You need to use a special metal stamping kit that is designed for this specific purpose. Metal stamping kits come with all of the necessary tools and materials that you need in order to create professional-looking stamped designs on metal surfaces.
How do I cut my own stamping blanks?
If you want to cut your own stamping blanks, you will need to use a saw. You can either use a hand saw or a power saw, but it is important to make sure that the blade is sharp. Once you have cut your stamping blank to the desired size, you will need to file down the edges in order to create a smooth surface.
There are a few different ways that you can file down the edges of your stamping blank. You can use a hand file, an electric sander, or a power drill with a grinding attachment. Whichever method you choose, make sure that you are wearing protective eyewear and gloves to avoid injury.
Once you have filed down the edges of your stamping blank, it is time to start stamping! Place your blank on a hard surface and use a hammer to gently tap the design into the metal. If you are not happy with the way that your design looks, you can always start over again.
How do you color stamped metal?
There are a few different ways that you can color stamped metal. One way is to use the patina. This is a chemical solution that will change the color of the metal. Another way to color stamped metal is to use paint or ink. You can either brush the paint onto the metal or use a stamping pad to apply ink to the design.
Whichever method you choose, make sure that you seal the design with a clear coat of varnish or lacquer in order to protect it from corrosion.
Useful Video: 10 Best Metal Stamping Kits 2020
Conclusion
So, what’s the best metal stamping kit? It really depends on your needs and preferences. We hope that this article has helped you to understand the different types of kits available and the benefits and drawbacks of each type. Armed with this information, you should be able to find the perfect kit for your own personal needs. Thanks for reading!
References:
- https://www.esict.com/what-is-metal-stamping/
- http://www.ialwayspickthethimble.com/2014/01/04/metal-stamping-tips-tricks-2/
- http://www.crafttestdummies.com/craft-tool-review-impressart-metal-stamps/
- https://www.market-prospects.com/articles/hydraulic-presses-and-mechanical-presses
- https://metalexponents.com/blog/types-metal-stamping-processes/