Do you have any brass items that could use a little sprucing up? Brass can be notoriously difficult to polish, but with the right tools and techniques it’s definitely possible to achieve a mirror finish. In this comprehensive guide, we’ll answer all of your questions about polishing brass, from the products you’ll need to the steps involved. So let’s get started!
Required Materials and Tools
You will need a few supplies before you get started polishing your brass. In addition to the brass itself, you will need:
- Polishing compound
- A clean rag or cloth
- A soft brush (optional)
- Water (optional)
If you have never polished brass before, it is always a good idea to start with a small piece to get a feel for the process and ensure you are happy with the results. Once you are confident in your ability, you can move on to larger pieces.
Abrasive Pads
If you’re using an abrasive pad, make sure to wet the surface of the brass with water before you start scrubbing. This will help to avoid scratching the metal. Start with a coarse-grit pad and work your way up to a finer one.
When you’re finished, rinse the brass off with clean water and dry it thoroughly with a soft cloth. [11]Surface Protection
One of the most important things to keep in mind when polishing brass is surface protection. You want to make sure that you protect any surfaces that might be susceptible to scratches or other damage from the polishing process. This includes using a soft cloth to wipe down the area before you begin and being careful not to apply too much pressure while polishing.
Another thing to consider is the type of polish you use. Some polishes are more abrasive than others and can damage the finish on your brass if used incorrectly. It’s important to read the directions on your polish carefully and follow them closely to avoid damaging your brass. [10]
Once you’ve taken these precautions, it’s time to start polishing!
Step-by-step Guide
Step 1: Preparation Before Polishing
The first step is to remove any dirt, grime, or tarnish from the brass surface. This can be done with a variety of cleaners, including lemon juice, vinegar, and baking soda. You can also buy commercial brass cleaners at most hardware stores.
Once the brass is clean, it’s time to start polishing. There are a few different ways to do this, but we’ll focus on two of the most popular methods: using a cloth and using a machine[9]
Step 2: First Stage of Wet Sanding
After you’ve completed the cleaning process, it’s time to start wet sanding. For this step, you’ll need 600-grit wet/dry sandpaper and a bucket of clean water.
Start by submerging your piece of brass in the water for a few minutes. This will help to lubricate the metal and prevent the sandpaper from clogging.
Next, attach the 1000-grit sandpaper to your sander and begin moving it over the surface of the brass in a circular motion. Be sure to keep the sander moving at all times to avoid damaging the metal.
Continue wet sanding until you’ve removed all of the tarnish and oxidation from the surface of the brass. This may take some time, so be patient.
Once you’re finished, rinse the brass off with clean water and dry it thoroughly with a soft cloth. At this point, your brass should have a dull, matte finish. [9]
Step 3: Second Stage of Wet Sanding
After the first stage of wet sanding, you will need to start the second stage. This time, you will use a finer grit sandpaper. Start with a 1500 grit sandpaper and work your way up to a 2000 grit sandpaper. Remember to keep the surface wet while sanding. Otherwise, you risk damaging the brass.[11]
Step 4: Third Stage of Wet Sanding
Now that you have completed the second stage of wet sanding, it is time to move on to the third stage.
If there are any areas that are not perfectly reflective, you can go back and wet sand those areas with a 3000 grit sandpaper. Remember to keep the surface wet while you are sanding. [10]Step 5: Fourth Stage of Wet Sanding
After completing the third stage of wet sanding, you will have accomplished two things. First, you will have created a smooth, even surface on your brass object. Second, you will have removed any remaining scratches or imperfections from the previous sanding stages.
Now it’s time to move on to the fourth and final stage of wet sanding: using a very fine grit sandpaper. This step is important because it will remove any tiny scratches that may still be present on the surface of your brass object.[9]
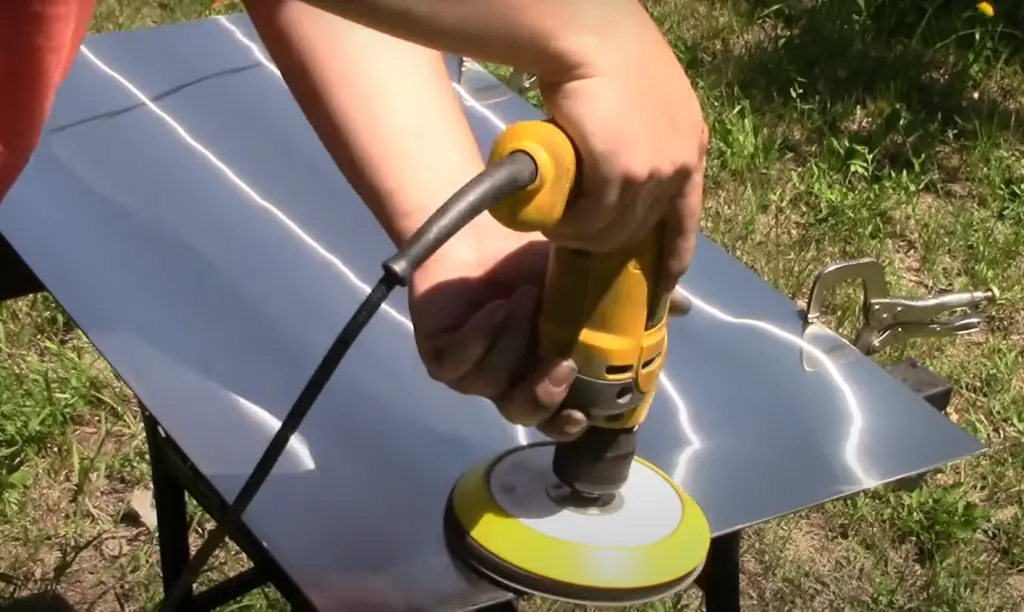
Step 6: Using Abrasive Pads
Use an abrasive pad to remove any remaining tarnish or oxidation. Abrasive pads are available in different grades, from coarse to fine. Start with a coarse grade and work your way up to a finer grade until the brass is shiny and smooth.
Be sure to follow the manufacturer’s instructions for use. Abrasive pads can be used wet or dry, but always use them with caution as they can scratch the surface of the brass if not used properly.
Once you’ve removed all the tarnish and oxidation, it’s time to move on to Step Seven.[9]
Step 7: Sandpaper Vs Abrasive Pads
Sandpaper is the traditional way to remove paint and other surface imperfections from brass. Abrasive pads are a newer option that many people find easier to use. Both sandpaper and abrasive pads come in a variety of grits, or particle sizes. The larger the grit number, the finer the particles.
For most projects, you’ll want to start with a coarse grit (320-400) to remove major imperfections, then move to a finer grit (600) for final prep before polishing. When using sandpaper, be sure to wrap it around a block or sanding pad to avoid damaging the brass surface. Abrasive pads can be used directly on the surface without a pad. [9]
Step 8: Polishing Stage
Now that you’ve removed all the tarnish, it’s time to give your brass a final polish. For this stage, you’ll need a clean, soft cloth and some brass polish. Apply a small amount of polish to the cloth and rub it into the brass in a circular motion. Continue until the entire surface is evenly coated. Allow the polish to dry for a few minutes, then buff it off with another clean, soft cloth. Your brass should now have a beautiful shine!
Step 9: Finished!
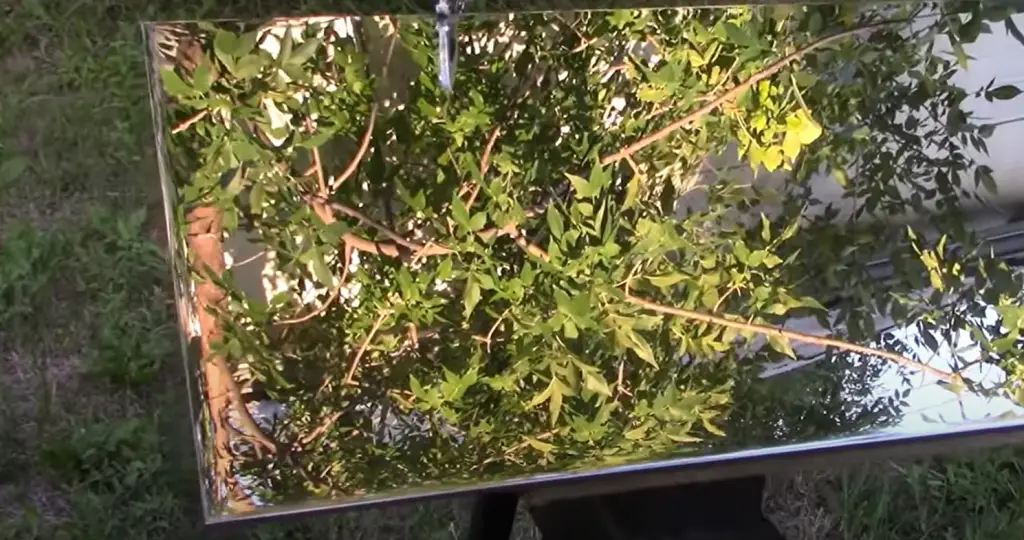
You’re all done! Your brass should now have a beautiful mirror finish. Be sure to take care of it by regularly dusting or wiping it down with a soft, dry cloth. If you notice any spots or smudges, simply repeat the polishing process until they disappear.
Make a Natural, DIY Brass Polish at Home
Lemon and Baking Soda Polish
You can make a natural, DIY brass polish at home using lemon and baking soda. First, cut a lemon in half and sprinkle baking soda onto the cut surface of one half. Rub the baking soda into the brass with the lemon half, working in small circles. Rinse the brass with water and dry it with a soft cloth. You can also add a little white vinegar to this mixture for extra cleaning power. [8]
Lemon and Salt Polish
If you’re looking for a natural way to polish brass, look no further than your kitchen pantry. All you need is some lemon juice and salt! Combine the two ingredients in a bowl and rub the mixture onto the brass with a soft cloth. Rinse with clean water and buff dry.
This method is great for small areas or delicate objects, as it won’t scratch the surface like some chemical polishes can. Plus, it’s affordable and easy to find everything you need at home. Give it a try next time your polished brass could use a little refreshment.[8]
Flour, Salt, and White Vinegar
To clean brass with this natural method, you’ll need some common household supplies. Combine flour, salt, and white vinegar to form a paste. Apply the paste to the brass surface using a soft cloth or brush. Rub gently in a circular motion until the tarnish is removed. Finally, wipe away any residue with a damp cloth and dry completely.
There are several things to keep in mind when using this method:
- The amount of flour, salt, and vinegar you’ll need will depend on the size of the brass object you’re cleaning. Start with small amounts and add more as needed.
- This paste can be stored in an airtight container for future use.
- If the brass is particularly dirty or tarnished, you may need to repeat the process a few times.
- Be sure to rinse away all of the paste and dry the brass completely after cleaning to avoid any damage. [7]
Ketchup, Tomato Sauce, or Tomato Paste
Ketchup, tomato sauce, and tomato paste are all great options for polishing brass. The acidity in the tomatoes will help to remove any tarnish from the brass. Simply apply a small amount of ketchup, tomato sauce, or tomato paste to a soft cloth and rub it onto the brass.
If you’re using ketchup, be sure to check the label to make sure it doesn’t contain any vinegar. Vinegar can actually cause brass to corrode.[7]
Consider Letting the Brass Age Gracefully, and Not Polishing It at All
One of the most beautiful things about brass is that it ages gracefully. Over time, it develops a natural patina that can give it an incredibly rich and warm appearance. If you’re not a fan of this look, however, polishing brass to a mirror finish is certainly an option.
FAQ
How do you keep brass shiny after polishing?
After you have polished your brass to a mirror finish, you can maintain its shine by regularly dusting it with a soft cloth. If your brass starts to look dull, you can clean it with a mild soap and water solution. For more difficult stains, you can use a brass cleaner or polish. You should always avoid using harsh chemicals or abrasives on brass as they can damage the finish.[1]
Can you over polish brass?
Yes, you can over polish brass. If you do, the brass will become thinner and more fragile. Eventually, it will crack and break. So be careful not to overdo it! [2]
Does WD-40 clean brass?
Yes, WD-40 is safe to use on brass. In fact, it can be used to clean a variety of metals, including stainless steel and aluminum. However, you should always test the WD-40 on an inconspicuous area first to ensure that it does not damage the finish.
To clean brass with WD-40, simply spray the product onto the surface and wipe it away with a soft cloth. For best results, Polish the brass afterwards with a quality metal polish. [3]
Does vinegar harm brass?
No, vinegar does not harm brass. In fact, it can be used to clean and polish brass. However, you should always dilute the vinegar with water before using it on brass. undiluted vinegar can damage the finish of brass.
To clean brass with vinegar, simply mix equal parts vinegar and water in a bowl. Then, use a soft cloth to wipe down the brass piece. You can also use an old toothbrush to scrub away any tough dirt or grime. Finally, rinse the brass with clean water and dry it thoroughly with a soft cloth. [4]
Can Coke clean brass?
Coke can actually be used as a brass polish! The acidity in Coca-Cola makes it perfect for breaking down tarnish on brass. To clean with Coke, simply pour it over the brass object and let it sit for a few minutes. After a few minutes have passed, use a soft cloth to wipe away the grime. Rinse the area with water and dry thoroughly. [5]
Can you clean brass with baking soda and aluminum foil?
Yes! This is a great way to clean brass if you don’t want to use harsh chemicals. Mix together equal parts baking soda and salt, then add enough water to make a paste. Rub the paste onto the brass with a soft cloth, then cover the area with aluminum foil. Leave for an hour, then remove the foil and rinse off the paste with warm water. Buff dry with a soft cloth. [6]
Useful Video: How To Sand And Polish Brass To Mirror Finish
Final thoughts
So there you have it, everything you need to know about polishing brass to a mirror finish. We hope this guide was helpful and that you now feel confident tackling this project. As always, if you have any questions or comments, please don’t hesitate to reach out. I wish you the best of luck with your project! Cheers!
References:
- https://www.washingtonpost.com/lifestyle/home/how-to-keep-the-shine-on-old-brass-
- hardware/2015/08/25/611bef8c-46a7-11e5-846d-02792f854297_story.html
- https://www.bobvila.com/articles/how-to-clean-brass/
- https://wd40.in/home-uses/cleaning-and-polishing-gold-and-brass-lamps-made-easy/
- https://www.hunker.com/12301052/how-to-clean-brass-with-vinegar-salt
- https://www.grove.co/blog/how-to-clean-brass
- https://www.manomano.co.uk/advice/how-to-clean-brass-8968
- https://cleaning.lovetoknow.com/Homemade_Brass_Cleaner
- https://www.architecturaldigest.com/story/how-to-clean-brass
- https://www.instructables.com/Beginners-Guide-on-How-to-Polish-Brass-to-a-Mirror/
- http://whiteglovefans.com/blog/2013/9/30/how-to-professionally-polish-brass
- https://www.architecturaldigest.com/story/how-to-clean-brass