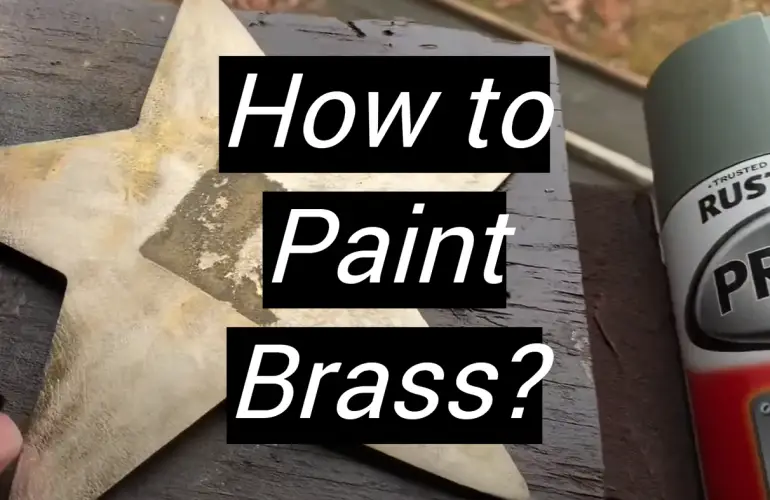
Brass is a popular metal for home decor. It has a warm, golden color that can brighten up any room. Painting brass is a great way to give your home a fresh look on a budget. In this article, we will answer some of the most common questions about painting brass. We will also recommend some products that will help make the process easier and more successful. Finally, we will provide some helpful tips to make the painting process go as smoothly as possible!
Can You Paint Brass?
Yes, you can paint brass!
You can use any type of paint that you would use on wood or other surfaces. To paint brass successfully, you must first prepare the surface correctly and use a high-quality primer. We will discuss both of these topics in more detail below. One common question people have about painting brass is whether or not they need to remove the lacquer coating first. The answer to this question depends on the type of lacquer that is used. If the lacquer is water-based, then you will not need to remove it before painting. However, if the lacquer is oil-based, then you will need to remove it with a special thinner before painting. [6]Another common question people have is whether or not they should sand the brass before painting. The answer to this question is usually yes. Sanding is a great way to create an even surface for painting. It will also help remove any dirt or grime that may be on the surface of the brass. [4]
To prevent your brass from being damaged by the paint, we recommend using an oil-based primer. This will create a barrier between it and any other substances you may apply to its surface in order for them not to have negative effects on one another when they come into contact with each others’ products.
There are also a few special considerations to keep in mind when painting brass. First, because brass is a soft metal, it is important to use a light-grit sandpaper to lightly sand the surface before painting. This will help the paint to adhere better and prevent it from chipping or flaking off later. Second, because brass tarnishes over time, you may want to clean it with vinegar or another mild cleaning solution.
Supplies for Painting Brass
Now that we have answered some of the most common questions about painting brass, let’s talk about supplies. Below, we will recommend some products that will help make the process easier and more successful.
You will need the following supplies for painting brass:
- A high quality primer – We recommend using an oil-based primer for best results. The oil-based primer will create a barrier between the brass and your paint, which helps prevent it from peeling or chipping.
- Paintbrush – Choose a paintbrush that is specifically designed for use with oil-based paints. These brushes are usually made with natural bristles.
- Paint – You can use any type of paint that you would like. However, we recommend using an oil-based paint for best results .
- Painter’s Tape – This will help you create clean lines and prevent paint from getting on areas that you do not want it to.
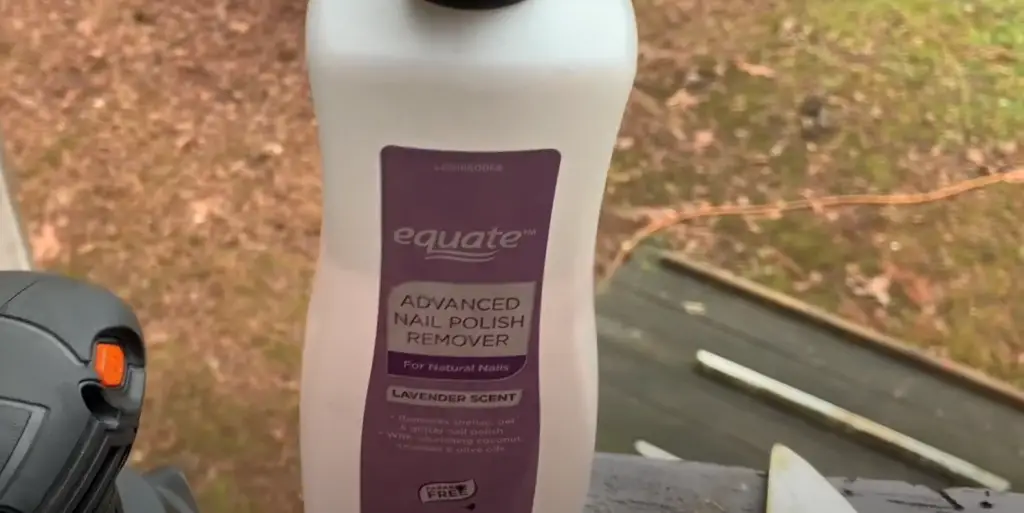
- A mild cleaning solution: Tarnishing is a natural process that occurs when metal fruits of its environment. To avoid having your brass turn colors and become less shiny, clean it with vinegar or another mild cleaning solution before painting.
- Drop Cloth – This will protect your floor or furniture from paint drips.
- Paint roller and tray – This is optional but can make painting large surfaces much easier.
- Tape measure – This will help you measure the area you are painting so that you can estimate how much paint you will need.
- Sandpaper – This is only necessary if you are sanding the brass before painting.
- Lacquer thinner – This is only necessary if you are removing an oil-based lacquer coating before painting. [3]
Once you have gathered all of your supplies, you are ready to start painting!
Painting brass is a fairly simple process. However, there are a few tips that will help you achieve the best results. First, always start with a clean surface. This means that you should remove any dirt, dust or grease before beginning to paint. Next, be sure to tape off any areas that you do not want painted. This includes the edges of doors and windows, as well as any hardware that is not being replaced. Finally, take your time and be sure to apply even coats of primer and paint.
Follow the instructions on your primer can for best results. We recommend that you prime your painting surface before adding the paint. This will help ensure a smoother final product and more even color distribution throughout! Once it’s dry, apply two coats of any desired color to obtain optimal coverage. Let those first couple of layers hybridize (which takes about 10 minutes) then come back later for another session if needed. Use painter’s tape and drop cloth for protection while painting. Once the final coat of paint is dry, you can remove the painter’s tape and enjoy your newly painted brass! [2]
When Is it Ok To Paint Brass?
Some people may hesitate to paint brass because they think it will devalue their home. However, this is not always the case! In fact, painting brass can actually increase the value of your home.
Even if you are not planning on selling your home, painting brass can still be a great way to update your space and give it a fresh new look.So, when is it ok to paint brass? The answer is – whenever you want! Just be sure to take the proper steps to prepare the surface and use high-quality products for best results. It is also a relatively simple and inexpensive project that most people can do on their own.

However, it is important to keep in mind that painting brass is not always the best option. In some cases, it may be better to simply clean or polish the brass instead of painting it. For example, if the brass is in good condition and does not have any major scratches or dents, then cleaning or polishing may be all that is needed to restore its original luster.[3]
Additionally, if you are trying to achieve a certain look, such as an antique finish, then painting brass may not be the best option. In this case, it would be better to use a patina solution or another type of aging technique. Finally, if you are unsure about whether or not you should paint your brass, we recommend talking with a professional before proceeding.
You can paint brass anytime you want to give your home a fresh, new look. Painting brass is also a great way to update old or outdated pieces. If you are planning on painting an entire piece of furniture, we recommend doing it in the spring or summer when you have more time to work on it. Additionally, if you are painting brass hardware, we recommend removing it from the piece before painting. This will make the project go more smoothly and help you achieve a better finish.
Tips
- Before taking your fixtures apart and down, make sure you turn off the power source for them. If you are not familiar with electrical connections or want to call someone who is qualified in this area of work then do so before continuing on because there could potentially still be live wires inside which will create an electric shock when touched by hand while working.
- Scrub away all the dirt and dust from inside of each fixture – an old toothbrush works well for this!
- Once you’ve removed all of your fixtures, it is important to take them apart completely. It’s a good idea to either use video or lot pictures so that when putting things back together later on in the process – you have no questions about what goes where. [3]
Step-by-Step Guide to Painting Brass
Now that we have answered some common questions about painting brass, let’s go over the steps you need to take to successfully paint brass.
Getting the Surface Ready for Painting
Remove the item if necessary. If you are painting a piece of furniture, you will likely need to remove it from the room so that you can work on it more easily. Place the item in the center of the room and cover it with drop cloths or old sheets to protect your flooring.
Remove all hardware from the item before painting if possible. This includes handles, pulls, hinges, and any other hardware.
Make sure that you have a good idea of where all the paint goes before getting started. If there are any areas on your project which need special attention, use painter’s tape to mark them for future reference and ensure an even application throughout![5]

Move the item to a well-ventilated area. If possible, paint the item outside so that you can take advantage of natural ventilation. If you are painting inside, open all of the windows in the room and use fans to help circulate the air. [7]
You can’t paint brass without a preparation surface. As we mentioned earlier, if the brass has a lacquer coating, you will need to remove it with a varnish thinner before painting. If the lacquer is water-based, you will not need to remove it.
Rub the item with sandpaper to create a smooth base for the paint to adhere to. Now that you’ve sanded the surface, use a clean cloth to remove any dust or debris. [1]
Applying Primer and Paint
Now that the surface is prepared, you can apply primer. As we mentioned earlier, we recommend using a high-quality oil-based primer for best results. Oil-based primers will create a barrier between the brass and the paint, which will help prevent the paint from peeling or chipping. To apply the primer, pour some into a paint tray and use a brush or roller to apply it to the surface of the brass. Work in small sections and be mindful of even strokes for best results. The key to making an elegant piece is taking care of each detail. We recommend applying two coats of primer, allowing each coat to dry completely before adding the next. [7]
The next step is to choose a paint that is suitable for the metal, such as an enamel paint, an acrylic or oil based product, or another hard-to-dry paint.
Spray paints give you complete control over how much coverage each section has, while providing an instant look that’s not too hard! For those who prefer to roll up their sleeves, liquids are also available in different shades that you can use as you see fit. In this case, a brush or roller should be used, but this will likely take longer and may not give such a smooth finish.The best way to avoid brass showing through is to use the right paint. For example, latex paint doesn’t stick well and can potentially ruin an expensive piece with a single swipe! Avoid this type of paint. However, if you really need to, they can be used, provided you choose a high quality primer.
Apply several thin coats of paint. Let each coat of paint dry. Work in small areas and use even strokes to ensure an even finish that won’t leave brush marks or drips when done. Once the final coat of paint is dry, you can remove the masking tape and enjoy your freshly painted brass!
To ensure your paint lasts longer, we recommend applying a clear coat of polyurethane or varnish after the paint has dried. This will help protect the paint from chipping or peeling. Apply the varnish with a brush or roller, working in small areas and even strokes. When you are done with the project, allow your clear coat to dry completely before handling or using it. [1]
Finishing the Job
Transfer the dry item to a drying rack. If you don’t have a drying rack, you can place the item on top of some old towels. Allow the paint to dry completely before moving on to the next step.
Replace any hardware that was removed earlier. If necessary, use a touch-up paintbrush to add paint to any areas that were missed.
The last step in painting a brass item is to wait for it to harden. This usually takes about 24 hours, but may vary depending on what type of paint you are using and how long ago the primer was applied (which may take longer). Once this period has passed – congratulations! Your new valuable acquisition is ready to enjoy. [1]
Maintain your painted brass. To keep your paint job looking its best, we recommend cleaning the item with a soft cloth and mild soap on a regular basis. Avoid using harsh chemicals or abrasive cleaners, as these can damage the paint. If you notice any chipping or peeling, touch up the affected areas with a little bit of paint. With proper care, your painted brass will continue to look great for years to come. [7]
FAQ
What kind of paint will stick to brass?
We recommend using an enamel or acrylic-based product. If you need something that’s quick drying and won’t leave any stains behind from water exposure like spray paints may be best for what type of project at hand – just make sure they’re also durable enough so this doesn’t happen in future projects! Avoid latex products because these don’t adhere well onto brass surfaces which means there could potentially end up being marks left behind due their less powerful adhesive qualities compared with other types available on store shelves today.
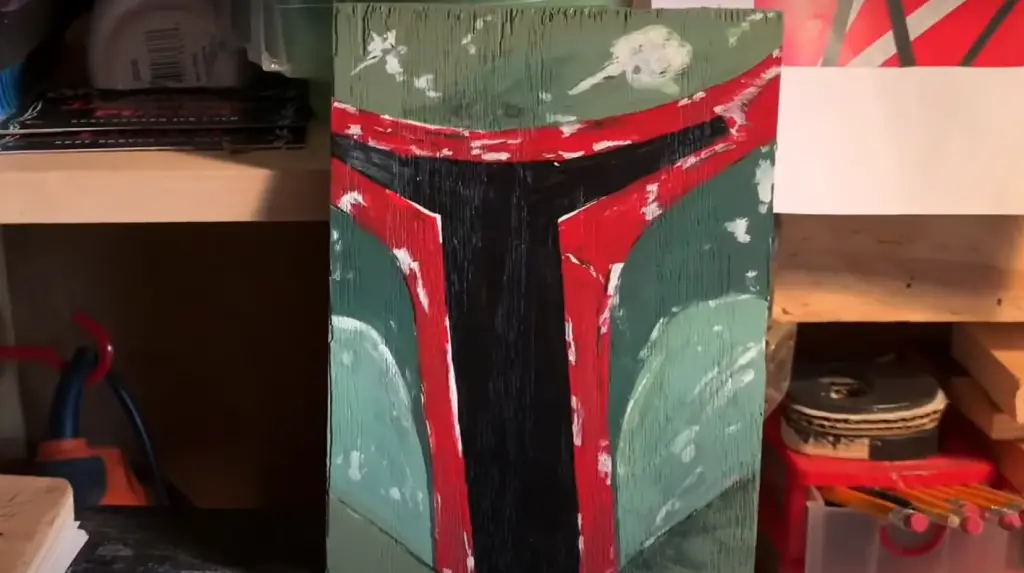
How to paint brass black?
To paint brass black, you will need to choose a black spray paint or another type of black paint that is suitable for metal. Apply several thin coats of paint. Let each coat of paint dry. Work in small areas and use even strokes to ensure an even finish that won’t leave brush marks or drips when done.
Allow each coat of paint to dry completely before moving on to the next. Once the final coat of paint is dry, you can remove the painter’s tape and enjoy your newly painted brass!
How to paint brass with acrylic?
Acrylic paint can be used on brass, but it is not as durable as other types of paint. To achieve the best results, we recommend using an acrylic-based primer and several thin coats of paint. Work in small sections and use even strokes. Allow each coat of paint to dry completely before moving on to the next. Once the final coat of paint is dry, you can remove the painter’s tape and enjoy your newly painted brass!
How to paint brass candlesticks?
To paint brass candlesticks, you will need:
- painters tape
- a drop cloth or old newspaper
- a can of primer specifically for metals
- a small brush or roller
- a can of high quality paint in the color of your choice. (You may want to consider using a paint designed for metal surfaces.)
- if your candlesticks are vintage or antique, you may want to use a metallic paint to give them an aged look.
- clear sealer (optional)
Begin by taping off any areas you don’t want painted, such as the tops of the candles or the bottoms of the candlesticks if they will be sitting on furniture. Place your drop cloth in a well-ventilated area, and then set the candlesticks on top.
Open your can of primer and begin painting the candlesticks, using either a brush or roller. Be sure to get complete coverage, and pay special attention to any areas that may be more susceptible to wear or chipping. Allow the primer to dry completely before moving on to the paint step.
Now it’s time to add the final color! Again, use either a brush or roller to apply paint evenly over the entire surface of each candlestick. If you are using metallic paint, consider doing two coats for even coverage and maximum shimmer. Once the paint is dry, you may want to add a clear sealer to help protect against wear and tear.
There you have it! Your very own painted brass candlesticks that will add a touch of elegance (or fun!) to any room in your home.
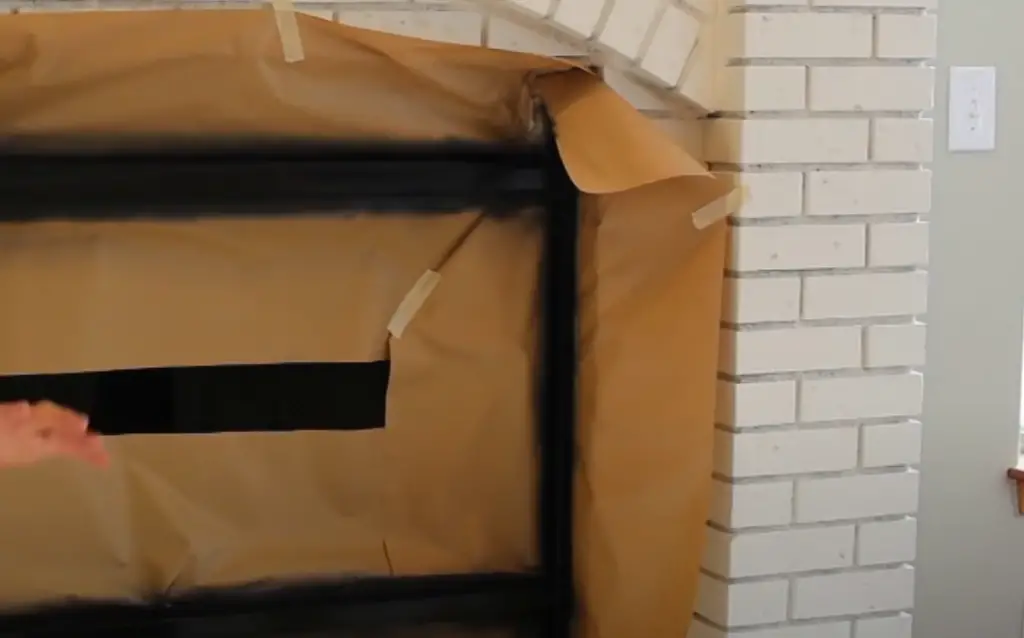
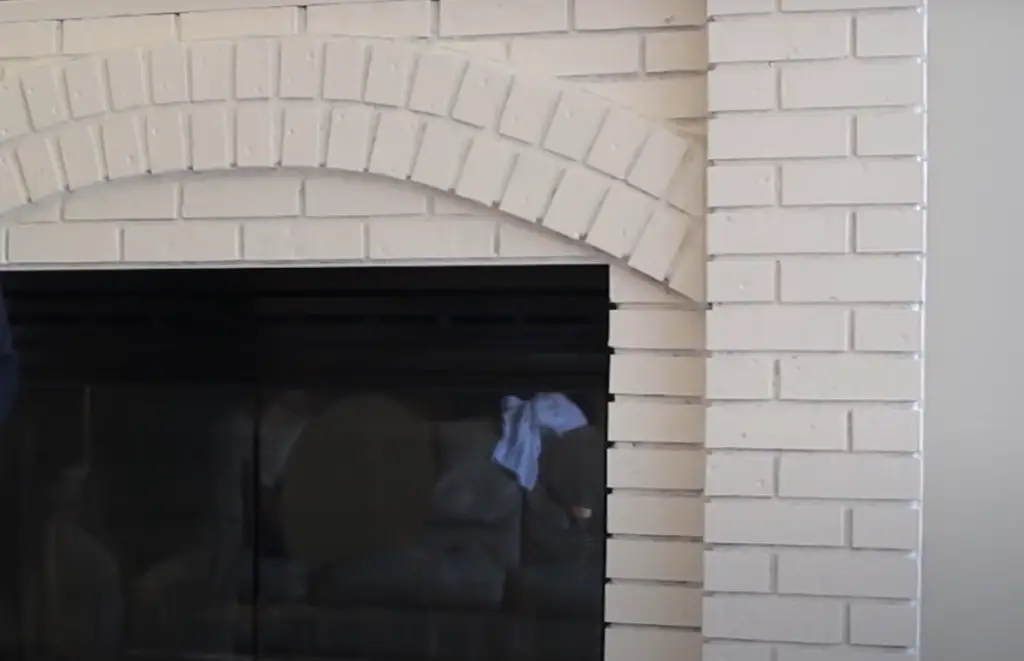
How to paint a brass fireplace?
To paint a brass fireplace, you will need to remove any soot or debris from the surface of the fireplace. Next, use a wire brush to remove any dirt or debris. Once the fireplace is clean, apply a thin coat of primer and allow it to dry completely. Next, apply several thin coats of paint, using even strokes. Allow each coat of paint to dry completely before moving on to the next. Once the final coat of paint is dry, you can enjoy your newly painted brass fireplace! With some patience and attention to detail, you can achieve professional-looking.
How to paint brass miniatures?
To paint brass miniatures, you will need to use a primer designed for metal. Apply several thin coats of primer, working in small sections and using even strokes. Allow each coat of primer to dry completely before moving on to the next.
Once the final coat of primer is dry, apply several thin coats of paint, using even strokes. Allow each coat of paint to dry completely before moving on to the next. Once the final coat of paint is dry, you can remove the painter’s tape and enjoy your newly painted brass miniatures!
How to paint brass furniture?
The first step is to clean the brass with a mild cleaner and then rinse it with water. Next, sand the surface of the brass lightly to create a smooth finish. Once the surface is prepared, you can apply a primer designed for use on metals. Finally, paint the brass with a high-quality metal paint in your desired color. With proper preparation and painting technique, you can achieve great results when painting brass furniture. Be sure to follow the manufacturer’s instructions for best results.
Useful Video: How to paint brass part 1
Conclusion
Brass is a beautiful and unique metal, but it can be difficult to keep its shine. In this blog post, we’ve outlined two methods for painting brass products so that they maintain their luster. The first method is a spray paint coating that will protect your brass from wear and tear. The second is a more traditional painting method using oil-based paints. Whichever method you choose, make sure to follow the proper preparation steps to ensure good results. Have you tried painting your brass products? We would love to see your finished projects!
References:
- https://www.wikihow.com/Paint-Brass
- https://artradarjournal.com/2021/12/01/what-paint-can-be-used-on-brass/#6
- https://www.ishouldbemoppingthefloor.com/2012/09/painting-over-brass-with-oil-rubbed.html
- https://painttopics.com/can-you-paint-brass/
- https://www.ehow.com/how_10041097_paint-over-brass-plating.html
- https://www.hometalk.com/diy/paint/furniture/q-brass-20034314
- https://www.hunker.com/12002443/how-to-paint-over-brass-or-metal